Sunday, December 29, 2024

Australian scenery


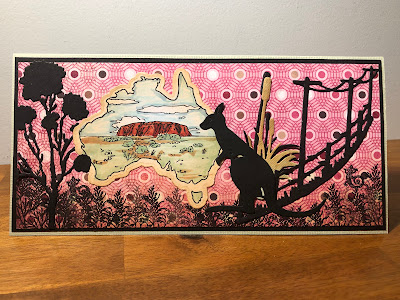
 I made this card for an Australian themed swap. I chose some designer paper for the background and using black ink I stamped the foliage along the bottom. I the added the die cuts and stamped image.
Supplies - Ultimate crafts stamps and dies - Red Centre, Gumtree and Outback fence, Gday Mate, Australia Map

Monday, December 23, 2024

Festive gold


A bit of festive gold for this Christmas card. I have used the Holiday Tapestry stamp set by Gina K. Heat embossed the image onto teal card stock using Egyptian gold embossing powder. I then layered the panel onto foil card stock, then adding it to the base card. Just a bit of ribbon for the embellishment.
 

Sunday, December 22, 2024

Lazy Sunday


I pulled this stamp set from forever friend's retro collection - the good life, out of storage, I think the first time I used it was in 2013. I made this card for a boys' and their toys card swap.


Friday, December 20, 2024

Baptism Blessing

I had a request to make a card for a Baptism, this is what I came up with. I didn't have any stamps in a religious theme, but I do love this mother and child stamp. I have had it for a long time, it is an unmounted red rubber stamp from a company called Whiff of Joy. 
I chose a cream and gold theme and used the embossing folder for the background and then added the die cut frame over gold card stock. I then added the ribbon and leaf die cuts along with the stamped image.
Supplies:
Stamps- Whiff of Joy - Willow with toddler
Creative expressions - Sue Wilson pin-point embossing folder
Elizabeth Craft Designs -1003 leafy branch die
Tonic Studio - Dragonfly delight die set


Monday, November 11, 2024

Embossed shell shaker card


I use the embossing folder to create the shell background. The embossing folder has a die in it to cut the Apture around the embossed shells at the same time as the embossing.  I sponged the embossed areas with the distress inks Mustard seed, rusty hinge, peacock feathers. Once that ink was dry I went over the raise areas with black ink. Behind the Apture space I added some acetate and using the piece cut out for the background part of the shaker card.

Wednesday, October 30, 2024

Love Hearts

 
I made this card for a love card challenge. It is a quick and fun interactive card using dies.


I made the base card using the Karen Burniston 1007 Charm Accordion die.
I then added the 1113 love Charms for the extra love elements.


Thanks for looking.


Sunday, October 20, 2024

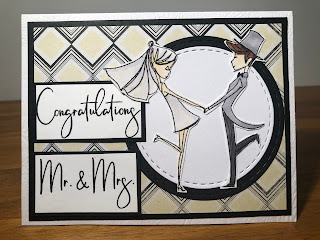
Congratulations Mr & Mrs


I made this card for a recent wedding, where the gifts were for a wishing well, so I made the card which was a bit dimensional for an envelope, so I made a gift box for it.
I made the front using die cuts and stamps from The Rabbit Hole Designs that I had in my stash for several years.

On the inside I created a pop up wedding cake using Karen Burniston’s 1028 Cake Pop up. I added a golf ribbon bow to the top of the card and added gold die cut bows to the cake using the KB 1183 Little Labels pop - up bow.


I then added the die cut sentiment K B 1032 Happily Ever After inside so that you could see it when it was displayed when it is open.

I added a place to sign on the back of the card along with the sentiment and a envelope to hold the cash gift.

Thanks for looking.


Friday, October 18, 2024

Class Tutorial September 2024


For my card today I decided to follow along with Karen Burniston’s September Class Virtual Tutorial.


It was great to follow along with Karen and pause when I needed to. It is also great to learn other ways to use her creative dies.


I chose some scrap designer paper that I had in my stash for this first attempt of this card. I just put the surprise sentiment inside as I think this could be a fun birthday card adding it to my stash of cards.


Just a close up of the inside put out.


Thanks for looking.


Saturday, October 12, 2024

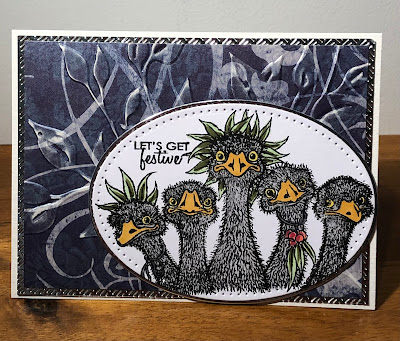
Birds of a feather

I dry embossed designer paper for the background before layering it on a card base. Added the Christmas Emus for the focal point for this fun Christmas card.


Sunday, September 15, 2024

A Sailing good time


This is the card I made for a friend for his 70th birthday. I chose the sailing theme as he is into outrigging and this is the closet I have to that theme. The sailboat is a clear stamp that was included in a magazine.


In the inside I have used Karen Burniston dies, 
1277 - boat pop up
1278 - sail boat add on
1279 - set sail boarder
A circle, oval and rectangle dies from my stash of dies from various companies. 
The designer paper is from a 6x6 Kaisercraft paper pack.


Tuesday, August 27, 2024

Birthday flowers


A couple of birthday cards for my stash of cards. Delightful daisies look great is pink or yellow.


Tuesday, August 20, 2024

Podium Platform


This is the card I made after being inspired with a Sam Calcott - mixed up craft tutorial.
I have used the same measurements as Sam has used in her tutorial.

These are the sizes you will need to pre-cut

Card size 11 x 5, score at 1, 23/4, 33/4, 51/2, 71/4, 81/4, 10
1piece 61/2 x 5 score at 31/4
1 piece 4 x 63/4
For Black Mat layer 2 pieces 33/4 x 51/2
2 pieces 3/12 x 51/4
black mat 2 pieces 43/4 x 3
2 pieces 41/2 x 23/4
black mat 2 pieces x 11/2 x 43/4
2 pieces x 11/4 x 41/2
black mat 2 pieces 3/4 x 43/4
black mat 2 pieces 11/4 x 43/4
1 x 41/2

Just follow along with the tutorial for assembling.

I didn't have any of the stamps that were used in the tutorial, so I used Gina K - Timeless poppies and the Cuttlebug houndstooth embossing folder. I also some nuvo drops for embellishments.

 Thanks for looking and have a great day.
Monday, August 19, 2024

Filled to the brim


I made this for a challenge card themed Friendship. 
I chose the silhouette stamp for the theme, sharing a cup with a friend is great therapy. I added the die cut embellishment for a bit of interest.
On the inside I made the teacup pop up using dies, I added some vellum smoke and a gold spoon. I then added the sentiment and the teacup border.


 Supplies:
Karen Burniston dies - 1269 - Tea and Coffee pop-up, 1270 - Boarder tea and coffee
Penny Black - sentiment cup of tea
Altenew - Ladies Day out.

Thanks for looking and have a great day.

Saturday, August 17, 2024

On Safari


This was made for a card challenge themed. - Safari

I taped a border with removable tape and used blending brushes and distress ink for the background, I then stamped the silhouette stamps and then removed the tape. I matted the card and then attached the stamped images that I had fussy cut out.

Thanks for looking.

Thursday, August 15, 2024

Welcome Baby


This is another baby card; this one is also gender-neutral, using the colours in the designer paper for the theme. The paper was so cute I wanted to show as much as I could.
Inside I made a pop - up card using dies. decorating with die baby elements.


 Thanks for looking.

Tuesday, August 13, 2024

Just a not to say


I couldn't wait to try the new release dies from Karen Burniston designs from the new release.
I loved the Lorna label when it was previously released, and these add ons are just fabulous.
The piano keys add such a fun element to any card. The used the colours from the designer paper for the theme, to keep the colour scheme I added pink keys instead of black.


 Supplies:
Karen Burniston dies:
1266 - Lorna Label pop-up
1276 - Happy Birthday add on
1275 - Just a note add on
1274 - Piano keys pop-up

Thanks for looking

Monday, August 12, 2024

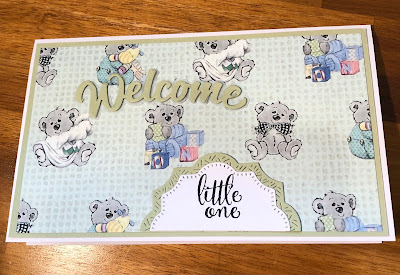
Welcome Little One


I was asked if I had any baby cards, which of course I didn't have so I made a couple for my stash of cards. I made this one a gender-neutral card.  Using the colours of the designer paper for the palate. 
On the front I have used the stamp image and made the inside with pop up dies. 


 Thanks for looking.

Sunday, August 11, 2024

Silhouette background


Just playing with some silhouette stamps and blending some distress inks for the background, to build up my supply of cards.


 Thanks for looking.

Wednesday, July 31, 2024

Althea of the Ocean


I created the background for this card using the double stencil technique. I start with the pebble stencil and blended various ink through the stencil. Keeping the stencil in place I placed the Nimbus stencil over it and add some more ink over it.  I then added the mermaid and jelly fish in black ink and sea tangle in green, blending ink around the edges. I also added midas touch pen for some shimmer.


Supplies
 Lavinia Stamps- Althea, Deeper than the ocean, sea creatures, sea tangle.
Lavinia Stencils - Pebble, Nimbus
Distress Inks - Evergreen bough, Twisted Citron, Tumbled Glass, Peacock Feathers, Salty Ocean
Nuvo pen - midas touch


Sunday, July 21, 2024

Tri Fold Robot Dog


I die cut the panels and the layers that came with this die set.
On the top layer instead of designer paper I embossed it with an embossing folder, I then took an ink pad and lightly rubbed it over the embossed areas.


I then stamped the robot dogs and coloured them and popped them on foam tape to add dimension to the card.


 Supplies
Stampendous - Robot dogs.
Cuttlebug - Clockworks embossing folder
Unknown - tri fold die set.

Tuesday, July 16, 2024

Dragonfly Keeper


 I made this for a card challenge. - double stencil. I started with the snowflake stencil and applied the ink through the stencil, while the stencil was still attached to the card, I placed another stencil on top and used a darker ink for this step. I then trimmed the card to size. Then I stamped the Fairy with black ink and highlighted the lamp and flicked gold ink all over the image. I wanted to add the verse since the background was so pretty so I stamped it onto vellum so you can still see the image underneath.

Supplies:
Gina K - snowflake Mandala stencil
Kaisercraft - spotty stencil
Lavinia stamps - Dragonfly Keepers, snowfalls
Distress ink - tumbled glass, weathered wood
Nuvo - midas touch

Tuesday, July 2, 2024

Little Dinosaur


I was asked to make a card for a boy who was turning 4 and liked Dinosaurs.
For the front on the card, I found this red rubber stamp in my stash of older stamps. The front panel measures 12cm x 13cm with the 1cm tab panel to be glued onto the inside panels.


For the inside I created a folded step panel and added the die cut dinosaur and number. Previously I had made a smaller version of the step card for this one the step panel measures 20 cm x 12 cm. Along the 20cm side, score at 4, 8, 12 and then on the 12cm side measure 4cm in from each end and cut from 4 to 12 and from 8 to 16.
Add the decorating layers and the die cut dinosaur and number. The black square in the middle is perfect for a sentiment. 


 Supplies

Spellbinders - Etched die Birthday Dinosaur, Etched Monster Balloons
The Greeting Farm - Oh Happy Day.

Saturday, June 29, 2024

Folded 3 step card


I made this folded 3 step card, to build up my supply of Birthday cards. 
Starting a base card measuring 25cm x 15cm and scoring at 5cm and down 5cm, the next score along is at 10cm scoring wright down to the bottom, then score at 15cm again to the bottom, then at 20cm score from the bottom up 5cms.
I then added the matt layers and the present images to complete the card. The card folds flat for postage.


Friday, June 28, 2024

Oriental Sunshade


Taking a step back in time to create this card. Many years ago, Oriental stamp were all the rage in cardmaking. This image is one of the first clear stamp image that I had purchased. I teamed it with the oriental sunshade embossing folder from Couture Creations. After embossing the card, I rubbed a gold ink pad over the raised areas, to keep them in place I then set it with clear heat embossing powder.

Thursday, June 27, 2024

Birthday fun


I made this card for my Granddaughter's first birthday; her first word was dog in fact she loves any dog.
This little set of Dachshunds is from Gerda Steiner, I sponged the background with inks, coloured and fussy cut the images and attached them to the card with foam dimensional tape.

Wednesday, June 26, 2024

Winter Wishes


This is a different type of fancy fold card that I have not tried before. It is called a 4 fold pop -out card. It takes me back to the time where all interactive cards were made with a ruler and a blade, not a die. I pulled out a snowman stamp from my stash for the front of the card and added some die-cut snowflakes.


The card base measures 10 1/4 x 5.5. Along the left side of the 10" side score at 11/2, 3 41/2, 6
along the 5.5" side cut a line 1" in from each end starting at the 11/2" to the 41/2" score line.
Fold these 1" ends into mountain, valley, mountain, the part in the middle becomes a mountain fold, on the inside I added another folded card 51/4 x 8 scored at 4"so that I can write a message.


Supplies
My Favorite things - Holiday hugs snowman
Sizzix snowflake die