Monday, December 25, 2023

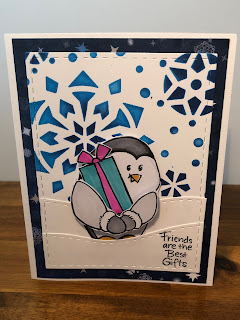
Friends are the best gift

Good evening, I hope that everyone had a wonderful with their families, this Christmas day.
This is my last Christmas card to share with you. 


I have a couple of Gnomes delivering the last of the presents. On the inside I have used the Paper frames pop-up. 
It looks very intricate, but it is all in the die. One of the fantastic creations dies from Karen Burniston. Funny I never noticed until I took the photo, but I didn't attach the fames as Karen explains in her tutorials. Even though I made this mistake it doesn't affect the way that the die works. I added a panel on the back of the card for signing.


 Supplies :
Karen Burniston dies - 1122 Paper Frames Pop-up
Beccy's Place - Gnomes
Stampendous - holiday expressions

All the best for Christmas
Cheers
Maryann

Sunday, December 24, 2023

Circle slide and Lock Gate Fold

I went a bit retro for these cards. I have had these images for some time in my stash of supplies.
I have used some embossing folders that I have had for some time. I used direct to paper technique to highlight the raised areas with gold ink. I then made a gate fold card base. 
Usually, a gate fold card is held closed with ribbon or a belly band. For this one I made a slide lock to hold the card closed.


I cut 4 circles, folding 2 in half and attaching the folded halves in the middle between the other 2 circles, this creates the lock. I the die cut the images and added them to the lock circles.


You can make the locks in other shapes or make the so that you can add shaped embellishments.


 Thanks for looking today.

Saturday, December 23, 2023

Wishing you Peace and Joy

 
Today I have for you another twist panel pop-up card. This style of card is great if you don't want to cover the designer paper that you have used. The inside pop-up panel just lifts out of the way so you can see the paper underneath.


 Thanks for looking today.

Friday, December 22, 2023

Faceted Hexagonal Aperture card


I recently found a tutorial on how to make this card, it was a couple of years old, but I thought it would be a bit of fun.
 I used a 6" x 6" pack of designer paper to decide on the card size. Cutting a card base into a 6" x 12" size I scored at 27/8", 53/4", 85/8", 111/2" leaving an 1/2" to glue the box together. 
On the 53/4" line mark 21/4" and 33/4" from these marks measure a straight line 11/2" either side of the center line, this will be your cut lines. Turning the card on its side the same center line measure done 1/2" mark and draw a line to the corners of the cut lines this will be your score lines. You should have 2 triangles scored either side of the rectangle.
Cut out the void between the cut lines to make a rectangle.
Using the score push them into the card to make the faceted hexagon shape. Fold the card so you can use it as a template for your first foil layer and fussy cut it out, then do the same with the designer paper. 
Before you glue down the front layers, you will need a strip of acetate 1" x 5", attach this to the card base centrally over the opening. You then can attach anything to the acetate that you want to pop up, usually a sentiment. I have added a bauble sticker that I had in my stash.
Glue the 1/2" tab to the other side to make a box. The box will fold flat for postage and can be posted in a 6" x 6" envelope.


If my instructions are a bit unclear you should be able to find the tutorial following the link at 
Thanks for looking,
 

Thursday, December 21, 2023

Christmas pop up


I find it is rather fun to used up some of my embellish stash and received this poinsettia flower in a recent swap, I had a small amount of ribbon leftover and added the die cut Merry Christmas to the front.
In the inside I have used the paper frames pop-up as a platform for the stamped images and added a die cut panel so that you can sign the card.


 Supplies

Karen Burniston dies :   1122 paper frames pop-up
                                       1177 Merry Christmas shadow
                                       1065 Merry Christmas
Stampendous clear stamps, ribbon, die cut flower

Wednesday, December 20, 2023

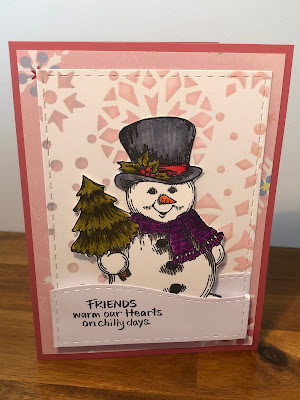
Chilly Days


 This is another stencil background that I had made the other day, this time I have used the distress inks, kitsch flamingo and shaded lilac. This time I have used a Penny Black snowman that I had found in my stash of stamped images.

Tuesday, December 19, 2023

Christmas Bow

I really enjoy making construction cards, I wanted to show card this beautiful ribbon that I found in my stash of supplies. I just added it to the front with a die cut sentiment.


On the inside is the pop -up surprise. I have used the twist panel die to create the pop up and attached some small, stamped images.

Supplies
Karen Burniston designs - 1009 twist panel pop-up.
      1177 Merry Christmas shadow
1065 Merry Christmas
stampendous clear stamps


Monday, December 18, 2023

Aperture z fold card


I received this card style a short while ago and since I love folded cards, I decided to make one for Christmas. It is a really easy card to make especially if you want to make them in bulk.

The card can be made any size to fit in an envelope. Fold your card stock in half and attach some designer paper on the front, then die cut a circle. Using another piece of card (for this card I am just calling the white card, but of course you can make it any colour) cut to fit inside the card base, leaving a small border around the edges. Using this white piece of card fold it in half and then score on half in half again. Attach it inside the base card glue it by the large panel on the bottom and then the top piece to the top of the card so that it looks like a z, leaving the middle panel unglued. 


 Put it aside to work on the next step. Die cut a piece of base colour card with the same die that you cut the original circle, then decorate it. While the card is in the closed position attach the circle through the hole and just add glue to the middle panel that shows through the hole.
As you open and close the card the attached circle with move through the hole. I then just decorated the bottom of the card to match the circle.

I have used Karen Burniston die - 1152 Long Nature Edges for decorating highlighting the edges with ink.

I hope you can understand my typed instructions and enjoy making your own design.

Thanks for looking,

Maryann

Sunday, December 17, 2023

Stencil snowflakes


I finally made it into the craft room to make a few Christmas cards. I pulled out this stamp set which had a snowflake stencil included.
I used two shades of distress ink to add dimension to the snowflakes, I then used dies to cut the rectangle and snow hills. I stamped the images and fussy cut them out popping the extra arms up for a 3D effect.

Supplies:
Distress ink - Salty ocean and Chipped Sapphire.
Stampendous cling stamp set, winter friends

Saturday, December 16, 2023

Christmas trees

This is one of my favourite cards to make for the Christmas season, especially if you go to the trouble of making a construction cards, 9 days out from Christmas.


The front of the card is very simple just some die, cut trees attached to oval die cuts, with some red glitter gems as embellishments. 
Inside the card is a beautiful pop-up of trees with some silver trimmings.


 Supplies

Karen Burniston dies 1062 Evergreen pivot panels
distress inks

Thanks for looking today.