Showing posts with label stenciled. Show all posts

Tuesday, August 25, 2026

Bird Collage


 I made this for a Collage swap and was pleasantly happy with how it turned out.
 For this card I started with swiping the ink across the card. I then added the leaves with a stencil and two green inks. I then added the stamps to the background with black ink. I added the die cut leaves and the bird that I had hand cut out. I coloured the flowers and the bird and added Plaid dimensional magic to add a gloss texture.

Monday, August 24, 2026

Hidden Numbers


I made this for a numbers card swap.
I started with a diamond stamped background from my card stash. I added the numbers with a stencil
 and blending the ink. I then added the stamps and blending the images with ink to add depth.


Sunday, March 1, 2026

Stenciled background


 I created the background for this card using the Altenew Layered Dahlia Stencil A & B. Using a stencil is great for making quick cards. I applied the stencil layers over a light patterned designer paper. I then added the embellishments from my stash. 

Thursday, December 18, 2025

Cocktail hour


 It has been some time since I have shared my creations. While I have been creating, I just haven't been updating this blog for some time. 
This card is for a friend's request, something for a cocktail party.
I stenciled the background with pink ink to keep the colours in a fruit cocktail theme. The cocktail glasses were fussy cut out and mounted on foam tape. I added nuvo drops as embellishments.

Friday, March 14, 2025

Stenciled Background


 Just another card for my supply stash. I started with the stencil background in distress oxide ink - twisted citron. I was given the floral and stamp and die set. I added some nuvo drops around the edges. 

Wednesday, July 31, 2024

Althea of the Ocean


I created the background for this card using the double stencil technique. I start with the pebble stencil and blended various ink through the stencil. Keeping the stencil in place I placed the Nimbus stencil over it and add some more ink over it.  I then added the mermaid and jelly fish in black ink and sea tangle in green, blending ink around the edges. I also added midas touch pen for some shimmer.


Supplies
 Lavinia Stamps- Althea, Deeper than the ocean, sea creatures, sea tangle.
Lavinia Stencils - Pebble, Nimbus
Distress Inks - Evergreen bough, Twisted Citron, Tumbled Glass, Peacock Feathers, Salty Ocean
Nuvo pen - midas touch


Monday, June 10, 2024

Stencil and ink.

 This is a quick and easy card to make when you need one in a hurry.

I started with the background blending ink through a stencil. I then heat embossed the floral image and then added some nuvo drops around the flower. 


Supplies

Gina K - you are loved stamp set.
Altenew stencil - liquid marble
distress ink - salty ocean, milled lavender
 nuvo drops - black

Thanks for looking today.

Tuesday, May 28, 2024

Dragonflies


I dry embossed the background panel and added gold ink to highlight the embossed areas. I then stamped the dragonflies ink black ink and using a stencil, I added a flourish to the background. Then coloured the dragonflies with pencils.

 Supplies 

Couture Creations embossing folder - drifting endless

Dragonflies stamp

wink of stella clear glitter, flourish stencil colouring pencils, brilliance gold ink


Sunday, May 26, 2024

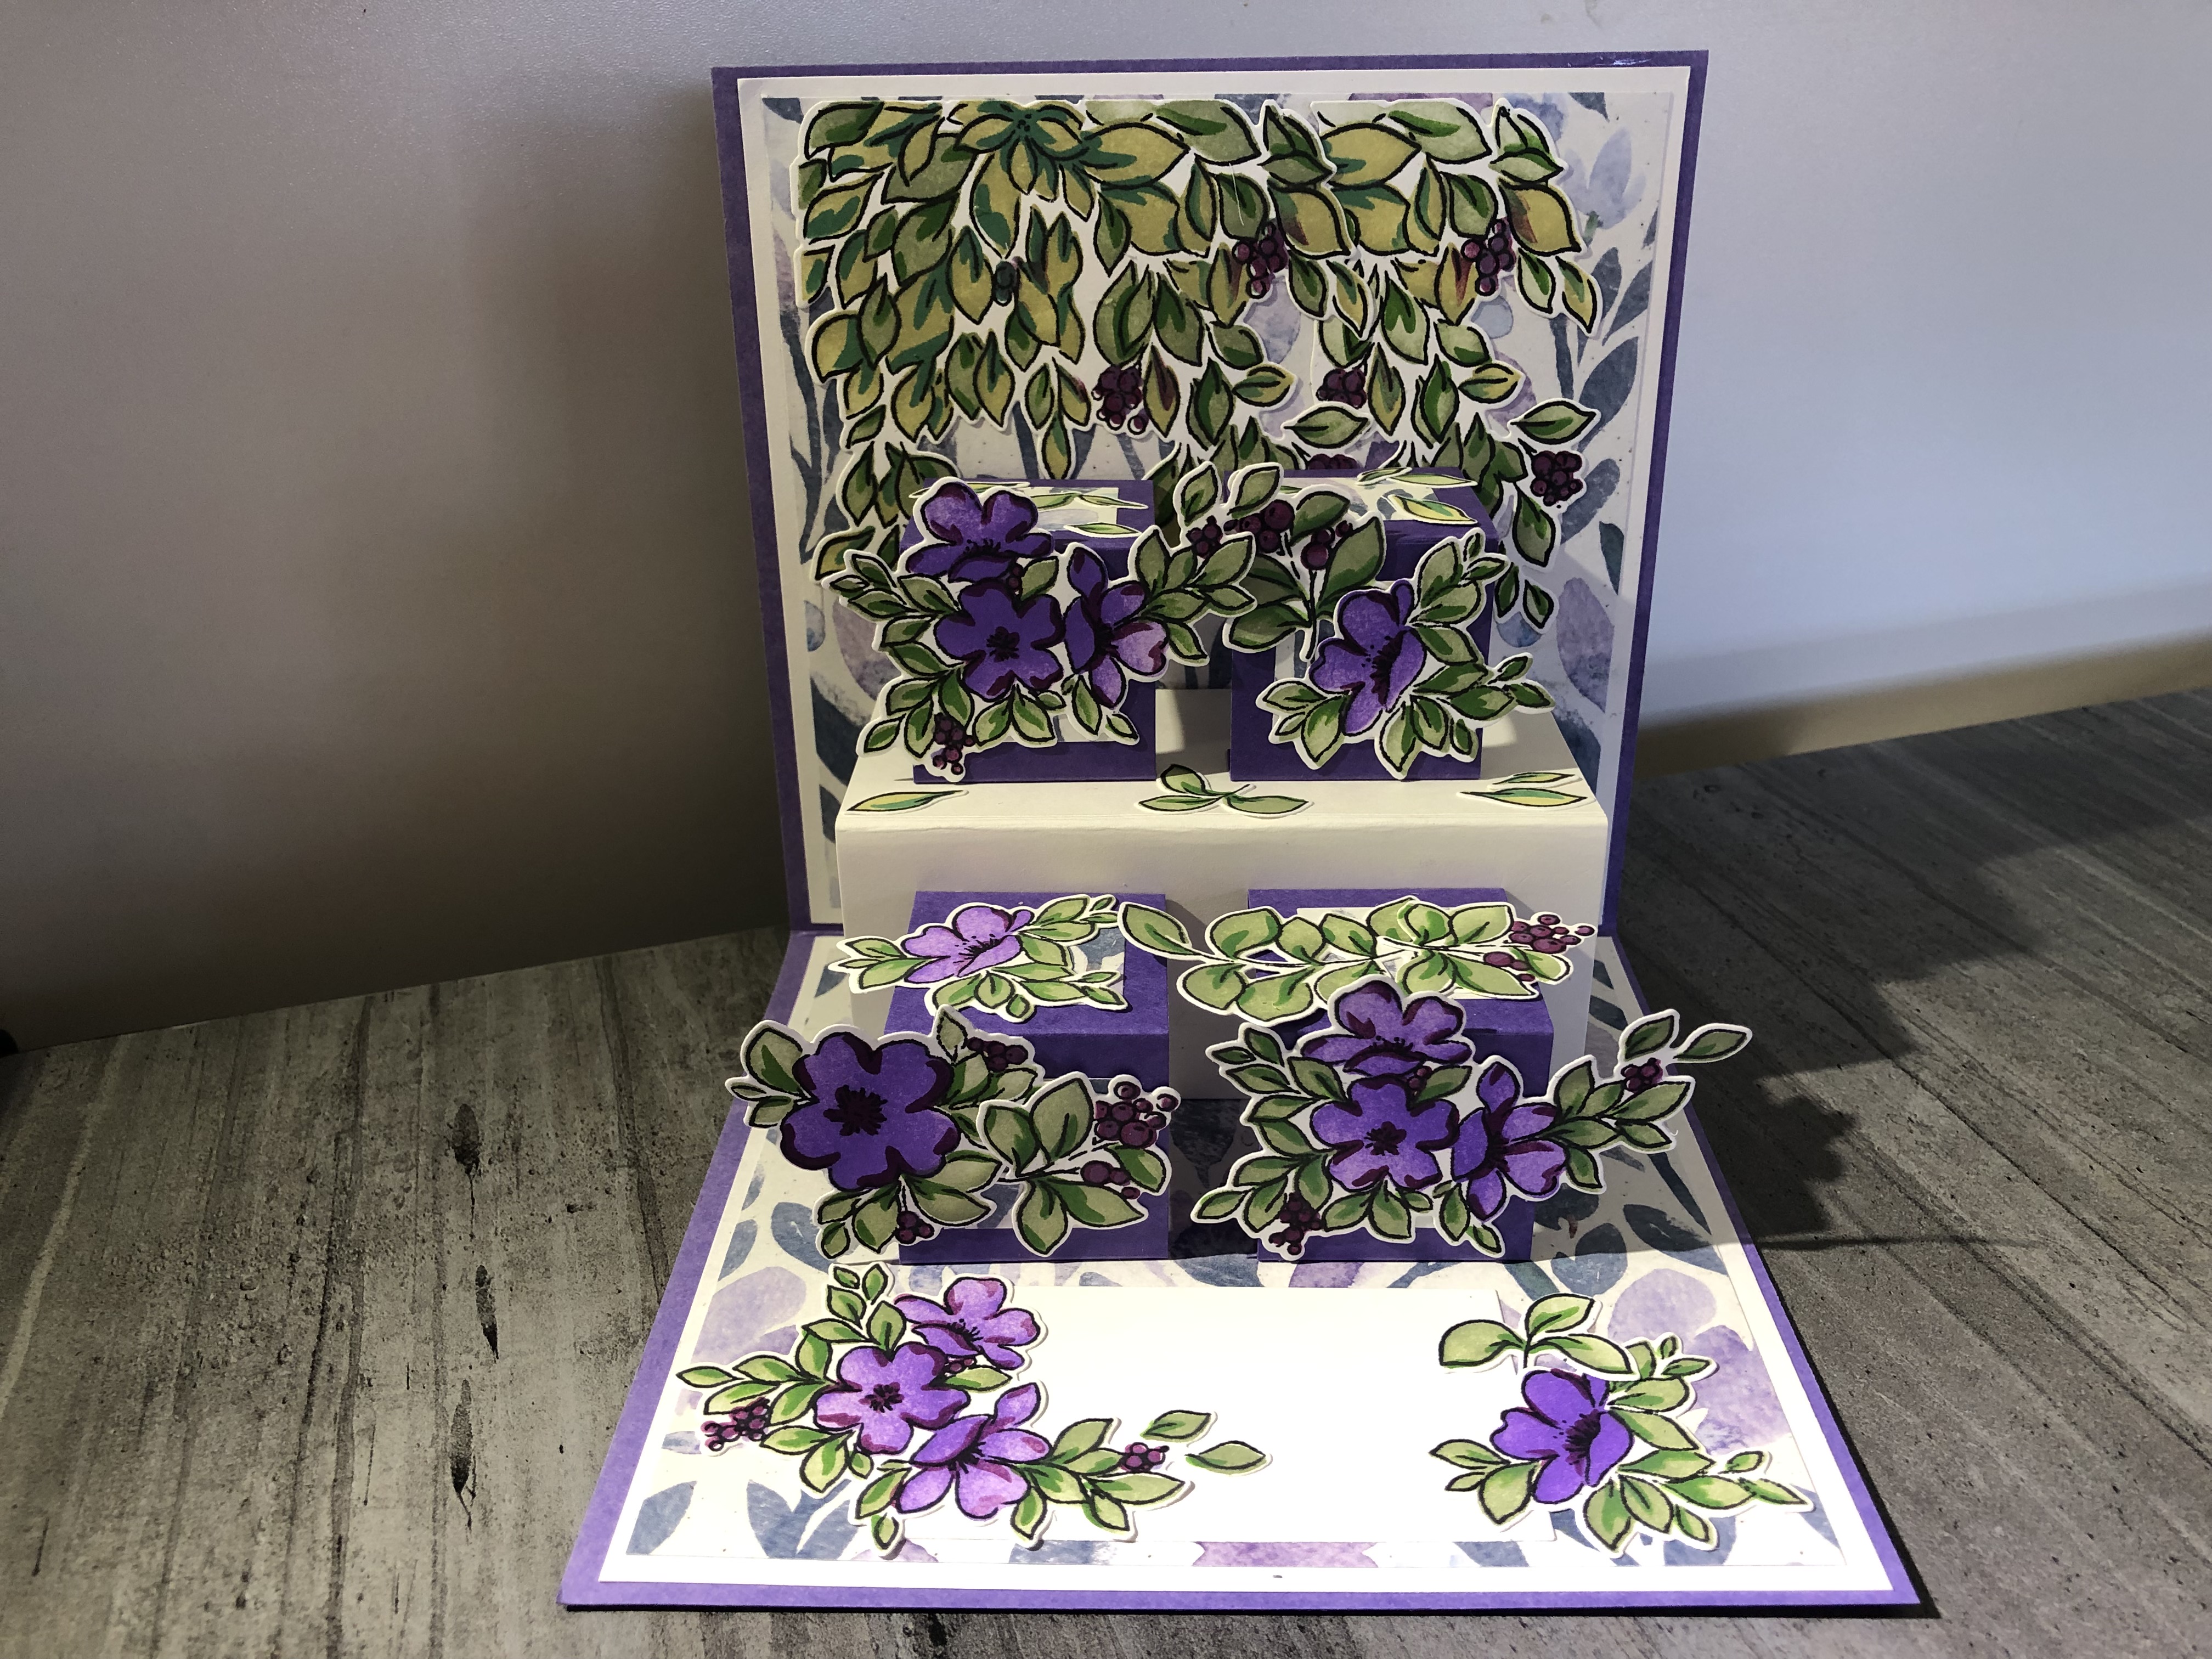
Cube step pop up card in purple.

This finished card measures 6 x6. This card was inspired by and Sam Calcott tutorial.
I used the Pinkfresh set of Stamp, stencil and dies for the decoration of this card.
3 pieces of card 53/4 x 53/4 and designer paper measuring 51/2 x 51/2 one for the front and two for the inside.


Inside the card I created a platform to add the floral images.
1 piece 41/2 x 5 card, along the 5” side score at 1/2, 21/2, 41/2.
4 pieces 11/2 x 4” card, along the 4” side score at 1/2, 2, 31/2.


Attach the piece 5” piece by glueing the 1/2” scored piece so that it pops up. Then attach the smaller panels and centralised so that each panel pops up and down when the card opens and closes.


 Supplies

Pinkfresh - in the meadow, stamp, die and stencil

Tuesday, October 24, 2023

Hydrangea Garden


 For this card I started with the stenciled background, I have used the Lavinia stencil Flourish and Distress ink with Evergreen bough and twisted citron. I stamped the Hydrangea flower onto designer paper and cut it out and attached it to the card with foam tape. For the leaves I stenciled with the ink and added a darker layer of ink on the edges. I coloured the butterfly with copic alcohol pens. I added the sentiment from the stampendous thoughtful wishes, sentiment set.

Have a great day.

Thursday, October 12, 2023

Teenage Dreams


 I made this card for a teenage challenge. What teenager doesn't dream of their own car. I pulled an old rubber stamp image for this card and stenciled the background.

Thanks for looking today.

Wednesday, September 13, 2023

Just Because


I am sharing this card with you well it is a just because card. I have stamped the flower image with black ink. I then used the corresponding stencils to colour the image with destress inks. I the heat embossed the sentiment on vellum and torn the edges before adding it to the card.


Thanks for Looking...

Thursday, May 18, 2023

Happy Mothers Day Card


This is the card that I made recently for Mother's Day. I started with stenciling the card base in Distress oxide inks for a soft background. I stamped the Daisies, coloured them with copic pens, the fussy cut them out. I attached them to the card base with foam tape and add Nuvo drops for embellishments and added the die cut sentiment.

Thanks for looking today.


 Supplies:
Stamps - Gina K delightful Daisies
Die- Karen Burniston - Mother's Day 
Stencil - anko 
Distress Oxide inks - scattered straw, ripe persimmon


Thursday, May 12, 2022

Delightful Daisies

 Hi Crafting friends, 

Today on the CCEE Stampers Blog, the challenge is to use some sort of rolling on your card.

Today is National Foam Roller Day so show us your cards using any rolled technique!  There are many possibilities, like paper rolling, brayers, marbles - have fun with this!


For my card I used a brayer to roll ink onto a gel press plate, I first rolled Kitsch Flamingo onto the gel plate layered on the stencil and added picked Raspberry, I then pressed the card onto the ink. I then heat embossed the sentiment. I stamped the Daisies and fussy cut them out, I attached them to the card with foam tape. Then adding some black gems stones.

Don't forget to check out the CCEE Stampers blog to see the rest of the creations the CCEE Stampers have created this week. You can also see more details of their creations on their individual blogs.
Maryann Einam- You are here

Thanks for stopping by....

Sunday, May 8, 2022

Mother's day

Hi Crafting Friends,

Today I have a card I have made for Mother's day. This is the first Mother's Day for my Daughter, so I am giving her this card.


I made the card used the stamp and stencil from PinkFresh Studio -  Miss your smile stamp and stencil. I used the combinations of distress ink and distress oxide inks. I then added the pearls coloured with copic pens to match the inks. I then added the Happy Mother's Day sentiment die.

Thanks For Looking......

Sunday, December 5, 2021

Christmas Flowers

Hi Crafting friends,
The other day I created a background with the Tim Holtz stencil and distress oxide inks, I had so much fun and it turn out great so I made some more. I have used the same inks for each card just adding a bit more pressure as I applied the ink on one.


Supplies
Time Holtz stencil Poinsettia, distress oxide inks festive berries, twisted citron, rustic wilderness.
Sentiment - Mama Elephant Best Gift Ever.

Thanks for looking.....
 

Saturday, November 20, 2021

Christmas Sketch

It is challenge time on Crazy4Challenges.

It's the third Saturday of the month, which means time for a sketch challenge. This time around we have another Slimline sketch for you to use.


I have used the Tim Holtz Poinsettia Layering Stencil and distress inks for the background. I pulled the Spellbinders poinsettia die that I have had for many years. The sentiments are from Law Fawn Holiday Sentiments Reveal Wheel stamp set, that I have white heat embossed.


Don't forget to check out the rest of the “Crazies” cards over on the Crazy 4 Challenges blog and also their individual blogs for more details.

Maryann Einam- You are here

Thanks for stopping by today....

Thursday, November 18, 2021

Buffalo Plaid

On the CCEE Stampers blog today hostess Kelly has challenged us to make a buffalo plaid card.

 I absolutely adore black and white buffalo plaid (also known as buffalo check)

so please create a card with buffalo plaid as your focal point.


I made the background with the stencil and distress oxide inks. I made the die cut flower added the string and the die cut Merry Christmas before layering it onto the card base.


Supplies: 

Stencil 

Distress inks Hickory smoke, black soot

Couture creations Layered Poinsettia stamps and die set

Karen Burntiston - 1177 - Merry Christmas shadow and 1065 - Merry Christmas


Don't forget to check out the CCEE Stampers blog to see the rest of the creations the CCEE Stampers have created this week. You can also see more details of their creations on their individual blogs.
Maryann Einam- You are here

Thanks for stopping by....

Thursday, October 14, 2021

Magic Garden

This week on CCEE Stampers blog our challenge is to create a mini slimline card.

Just like Slimline Cards, Mini Slimline Cards are also becoming very popular, for our challenge this week create a Mini Slimline card. Typically Mini Slim Line Cards are either 3 1/2 inches x 6 inches or 3 inches x 6 inches. 


I started my card with the background making it with distress oxide inks. Using Twisted Citron, Rustic Wilderness and Squeezed Lemonade ink on the glass mat, I blended the inks and heat set them. I then used the Lavinia stencil Laurel and added lightly the chipped sapphire ink. I then added Mooch the cat with heat embossing. and added the Fairy Lantern and fairy. I then added the orchard grass along the edges and sponged chipped sapphire to the edges.

Don't forget to check out the CCEE Stampers blog to see the rest of the creations the CCEE Stampers have created this week. You can also see more details of their creations on their individual blogs.
Maryann Einam- You are here

Thanks for stopping by....

Saturday, October 2, 2021

Music inspiration

It is time to join the team on Crazy4Challenge for their challenge C4C604.

Be inspired by your favourite song to create your project. Please be sure to list the song with your entry. You can be inspired by the title, the lyrics, the overall theme or genre of the song. 

My chosen song is Cover me in Sunshine by Pink and Willow. It is such a lovely song and they seem to have so much fun making the film clip. 

I created my card with the Lavinia stamps Fairy having music fun in the sunshine.


Lavina Stamps - Night Watch, Stencil - Flourish
Distress Oxide - squeezed lemonade, twisted citron, rustic wilderness


Don't forget to check out the rest of the “Crazies” cards over on the Crazy 4 Challenges blog and also their individual blogs for more details.
Maryann Einam- You are here

Thanks for stopping by today....