Sunday, March 23, 2014

Meeting Els from Elizabeth Craft Designs

Well today was just a fantastic day I attended the Brisbane Craft show and I was able to book 2 classes with Els from Elizabeth Craft designs, this is the first time I have done any classes at this type of show. It was great to get personal instruction from this amazing lady.
For the first class we created two stand up cards, the pack included the card base that was cut with the stand up helpers, die cut shimmer sheetz that we were able to emboss and highlight with stazon ink, die cut flowers that we applied silk microfine glitter to also the butterfly, bee, leaves and words.

                                                        Getting ready for the second class
 In this class we got to use the accordion oval and stickers with silk microfine glitter and double sided adhesive sheets then coloured them with copic pens. The cards look stunning and it was so much fun. The flowers on the green card were made with a glittered flower and the adhesive velvet. The pack also included the ladybug die, flower & leaves from the daisy set.

I thought I would just include this photo of my with my friend Frances Byrne taken when she was demonstrating the Elizabeth craft design products at our favourite craft store in Brisbane recently.

Have a great day, I know I have.
Maryann

Another Candle

I fell in love with this designer paper as soon as I saw it, it just screamed birthday card. And what could be cuter that a few Penny Black hedgehogs on their way to a party. For this version of the double Katie Pivot card instead of folding it in half I folded down a third so that the bottom was larger so that the layered dies from the Katie pivot set could fit on the bottom.
  The verse is one I picked up the other day while shopping with friends, it was something new at our store it is from a company called verses. The verse on the front and inside comes as one stamp unmounted red rubber on foam cling, I inked it so I could have separate images.
I placed the sizzix banner over the folds to hide the crease lines and added a banner created with string and dies from the Elizabeth Craft designs Lots of pops die created by Karen Burniston.
When you stand the card up the banner swings from front to back. In the corner I used Elizabeth Craft designs 732 Candle die to create the candle and added glitter with double sided adhesive tape.
Supplies:
Stamps: Penny Black, Verses
Other: string, Katie Pivot Die, Spellbinder Die, Sizzix die, 
lots of pops banner die,candle die, copic pens, foam tape

Today I am going to the craft show in Brisbane and I am hoping to meet Els from Elizabeth Craft designs, looking forward to seeing some amazing things that can be done with her products.
Have a great day
Maryann

Saturday, March 22, 2014

Spring Flip it

This has to be one of the quickest card that I have ever made, now I love my sizzix flip it with the thick base plate but this card is made with the sizzix framelits set designed by Stephanie Barnard is just amazingly easy to use. Stephanie also designed the other sizzix flip its, but the best thing about these other that the thin cutting dies, it also comes with corresponding dies in the pack for easy layering.
 As this was the first time I have used this die, I went for the clean and simple look without any embellishments and let the beautiful designer paper speak for itself.
Thanks for looking
Maryann

Friday, March 21, 2014

Baby Snuggle

It has been awhile since I played with my Sizzix pop n cuts and I had this cute  image just waiting to be inked. I cut out the pop n cuts base card out of DCWV neutrals stack and matched it with baby boy designer paper.
The main image was coloured with copic pens.

  
The words on the inside are Stampin up sets and they are cut out with spellbinders dies.

Have a good day
Maryann


Thursday, March 20, 2014

Double Katie Pivot

I have been wanting to try this Double Katie Pivot card ever since I watched the tutorial on Karen Burniston's Blog. I had the left over piece of designer paper and all the bits and pieces from the other Katie pivot card I made the other day. The good thing about these dies is that they fit into any size card. Just follow the link to watch Karen's tutorial for the best instructions.
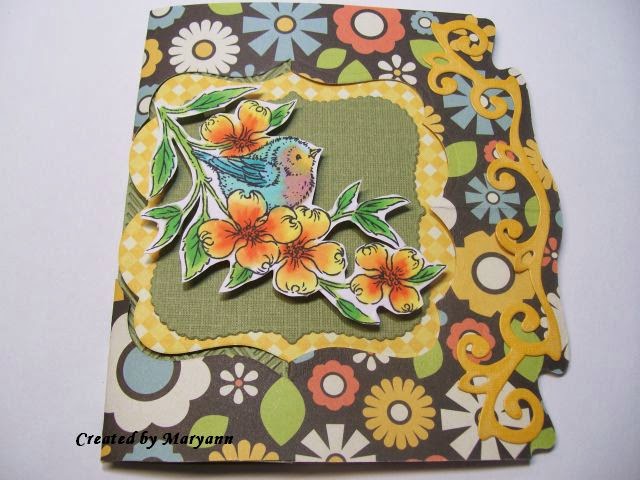
 This cute little bird is a stampavie stamp bird on a dogwood branch. Now when I showed this card to my friends they wanted to know what I used to create the matting layers. While we love all the new products on the market it is not always possible in reality to buy them. So I looked at all my dies and found the ones from spellbinders fit quite comfortably in the double pivot.
 Here is the back view of the card, I just love the way it sits flat for mailing.
Thanks for looking.
Maryann

Wednesday, March 19, 2014

For my Friend

Hi Everyone,
Today I got together with a couple of friends, we catch up each month for a chat and a bit of shopping at our favourite craft/scrapbooking store and come home with a few new items. This year we decided to challenge ourselves to make the most if our purchases and create a card each month. For this month we are using the Katie Pivot die designed by Karen Burinston for Elizabeth Craft Designs that we purchased last month.

For the base card I used a thicker double sided designer paper and used My Favorite things die-namic flower and flourish for the front. The Sentiment is the Brackets2cut set designed by Stephanie Barnard for the stamps of life.
 This is the card opened the sentiments have been matted using the layered dies that come with the Katie pivot dies set. The side pieces were created with the Agatha edges dies and the flowers are another My Favorite things flower die.
 This is the back of card. I recently watched a demo from one of Elizabeth Craft and Karen Burniston design team member and she made the comment " How many cards have you seen that look great from the back as well as the front" that has stayed with me,as I use these dies, in this case it is so true.

 I used an embossed panel of cardstock for make the card more stable, now I have seen some cards with this panel or without the choice is up to you.

I certainly had fun using this die and made a few others which I will post over the next few days.
Thanks for looking
Maryann

Tuesday, March 18, 2014

Tomorrow is another day

Once a month I get together with a couple of friends for an outing to a craft store. After a trip in January we decided for this year we would choose a purchased item that we all own to create a card before we would meet up again. For the month of February with was to use any of the sizzix grid dies to create a project.
I started with the die cut frame in black and glued in place on Some blue sticker paper that looks like water. The cute little guy was coloured with copic pens and mounted with foam tape. The text is a my Favourite Things stamp and it was cut and mounted to look like a banner.


Thursday, March 6, 2014

Pink and Blue Challenge

I created this card for the special sister Pink and Blue challenge on Boomerang stampers list a yahoo group for rubber stampers. For this challenge we had to create a card and add some special gift inside for our special stamping sister.
The stamp and text are from My Favorite Things, the butterfly was cut out with the corresponding die and layered onto cut with spellbinders nestabilities. I have used a Martha Stewart border punch for the edge of the verse.
Thanks for looking
Maryann